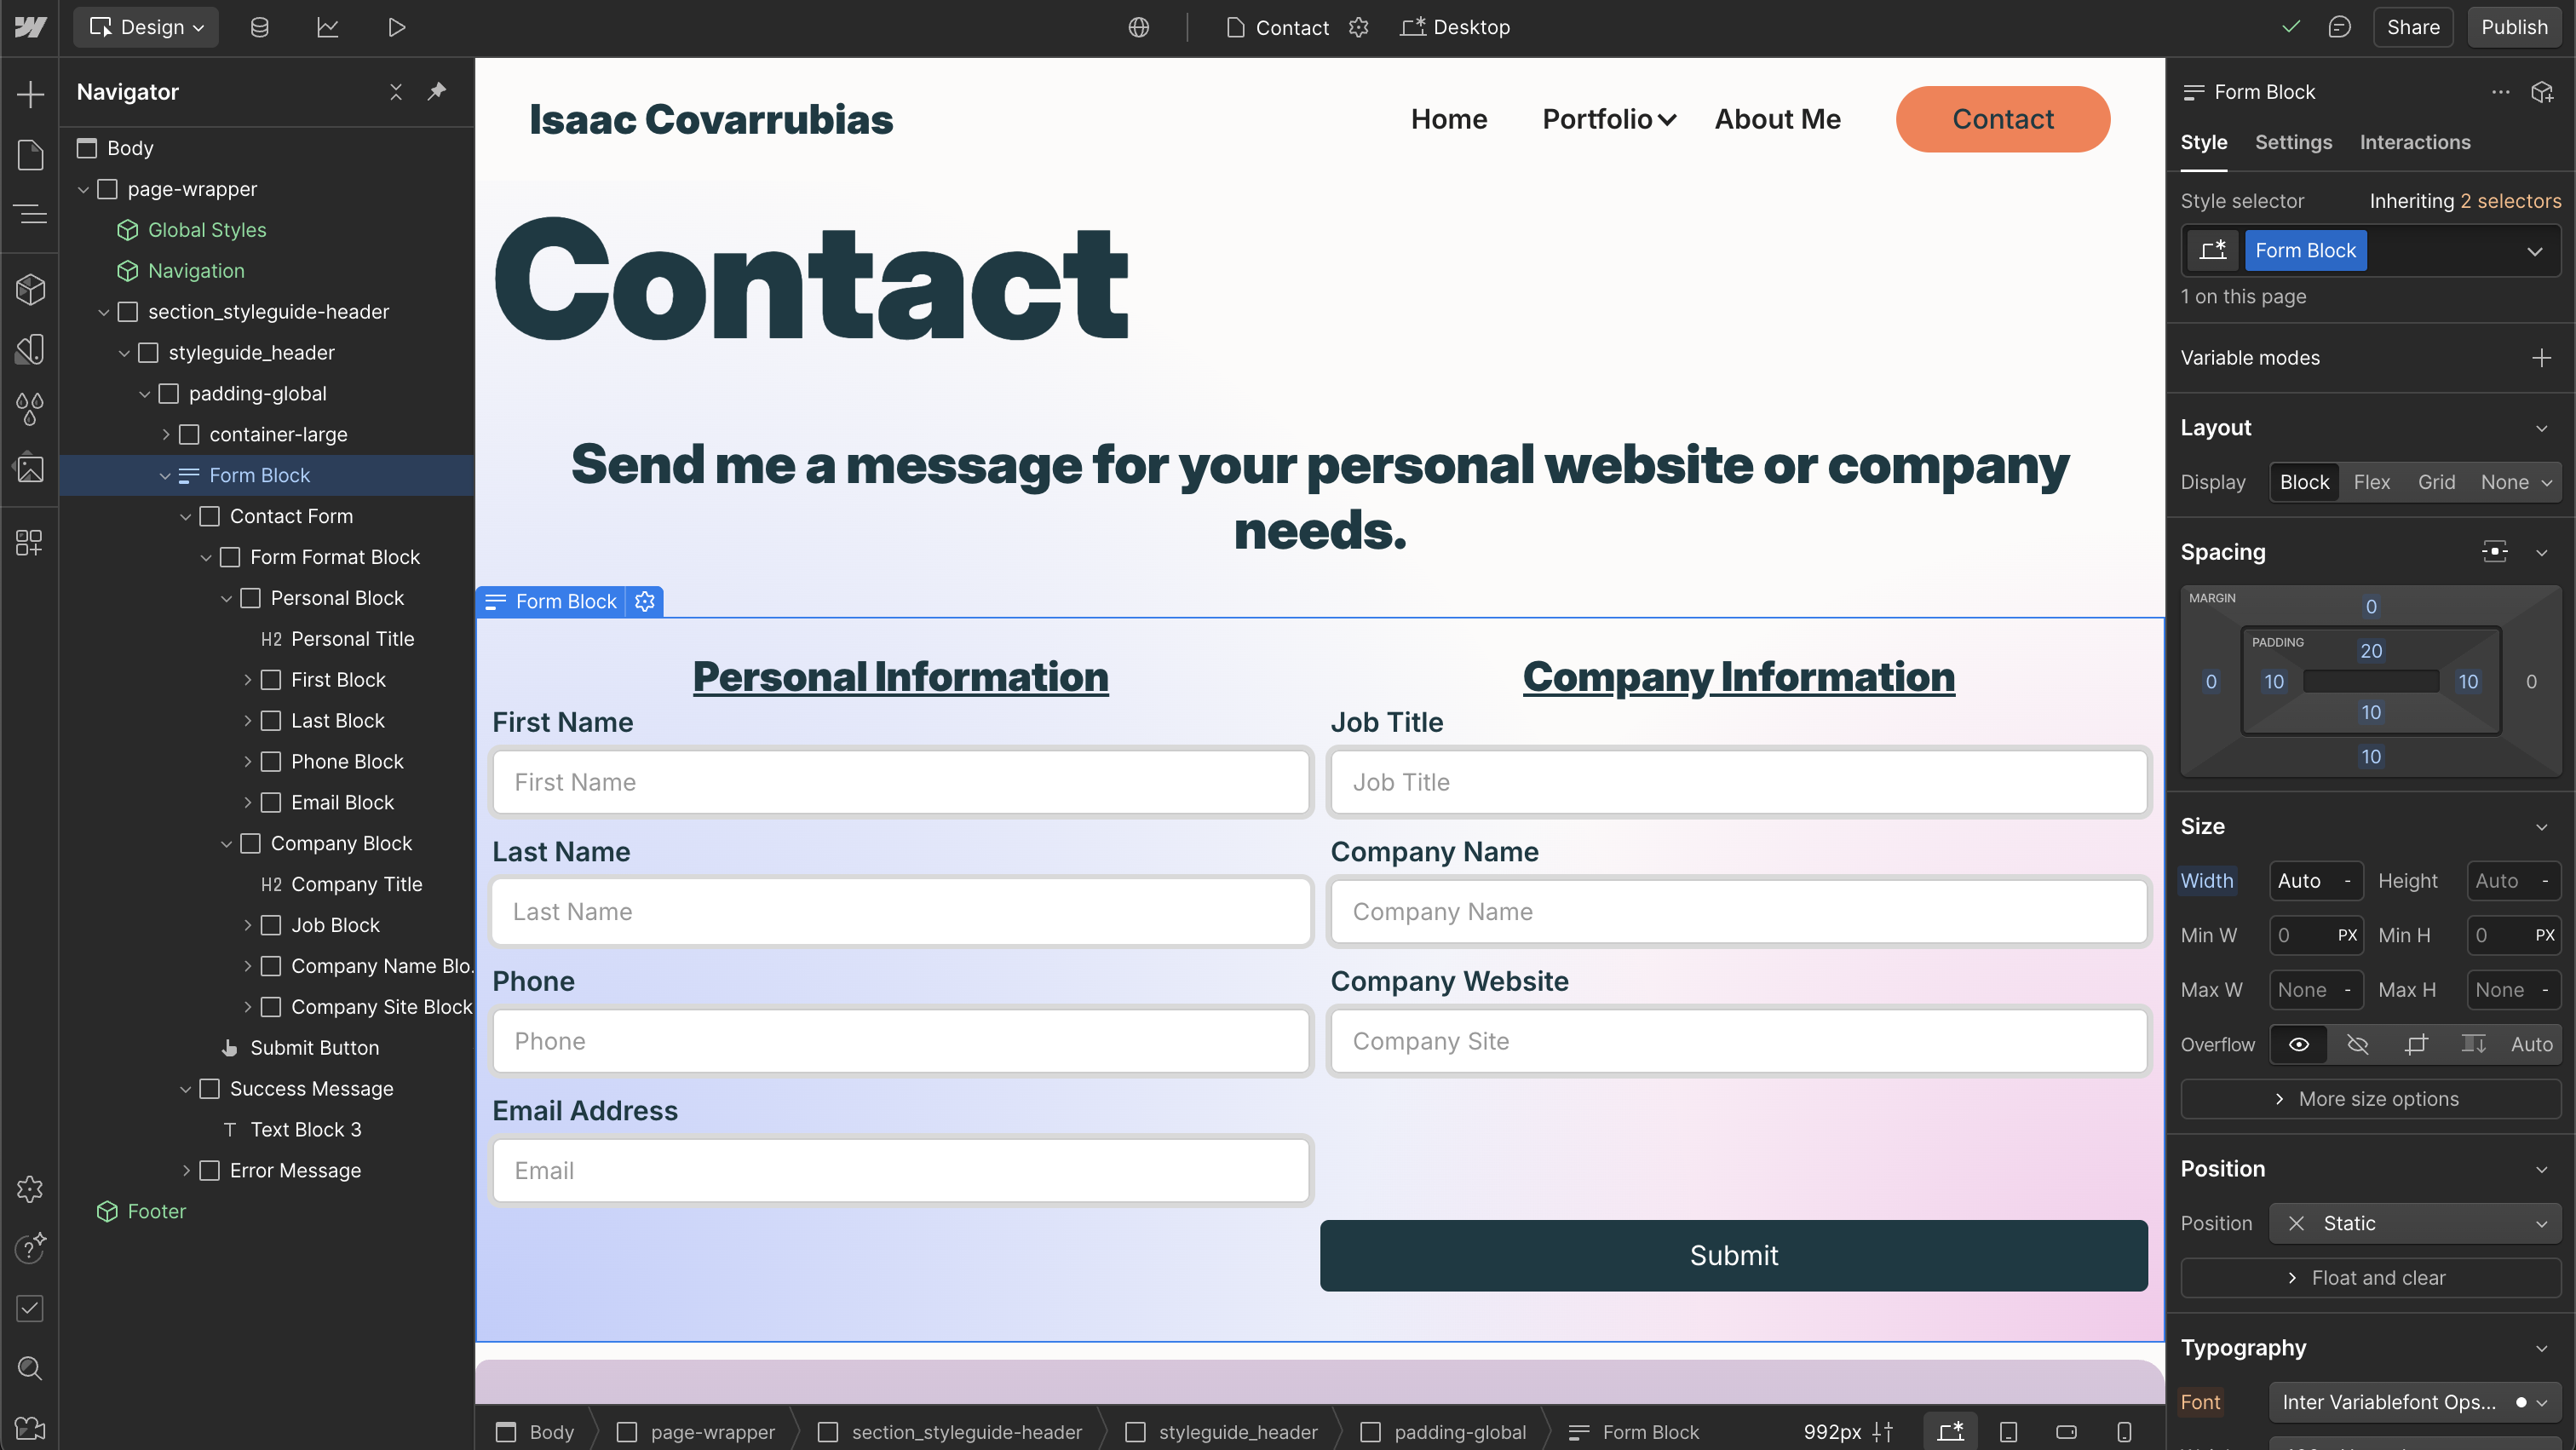
Form Structure
The form structure was pretty straight forward. You need to drop in the form element and then give each one a unique name and a unique id. To do that you need to click each of the forms to get into the settings and change the name up at the top, and also scroll a little until you see name and change that as well. This is important because it will be used in the webhook later on and it will make it easy if you know what fields you're using based on those names. From there the way it works is it grabs the users inputs and adds it to the next step, which is the web hooks. But before you do that, make sure you click on the CMS button, top left of the page (looks like 3 discs stacked), go in there and make sure you add the fields to the form (phone, email, name, etc.) as well for the webhook to get all the data structure.
Finsweet Setup
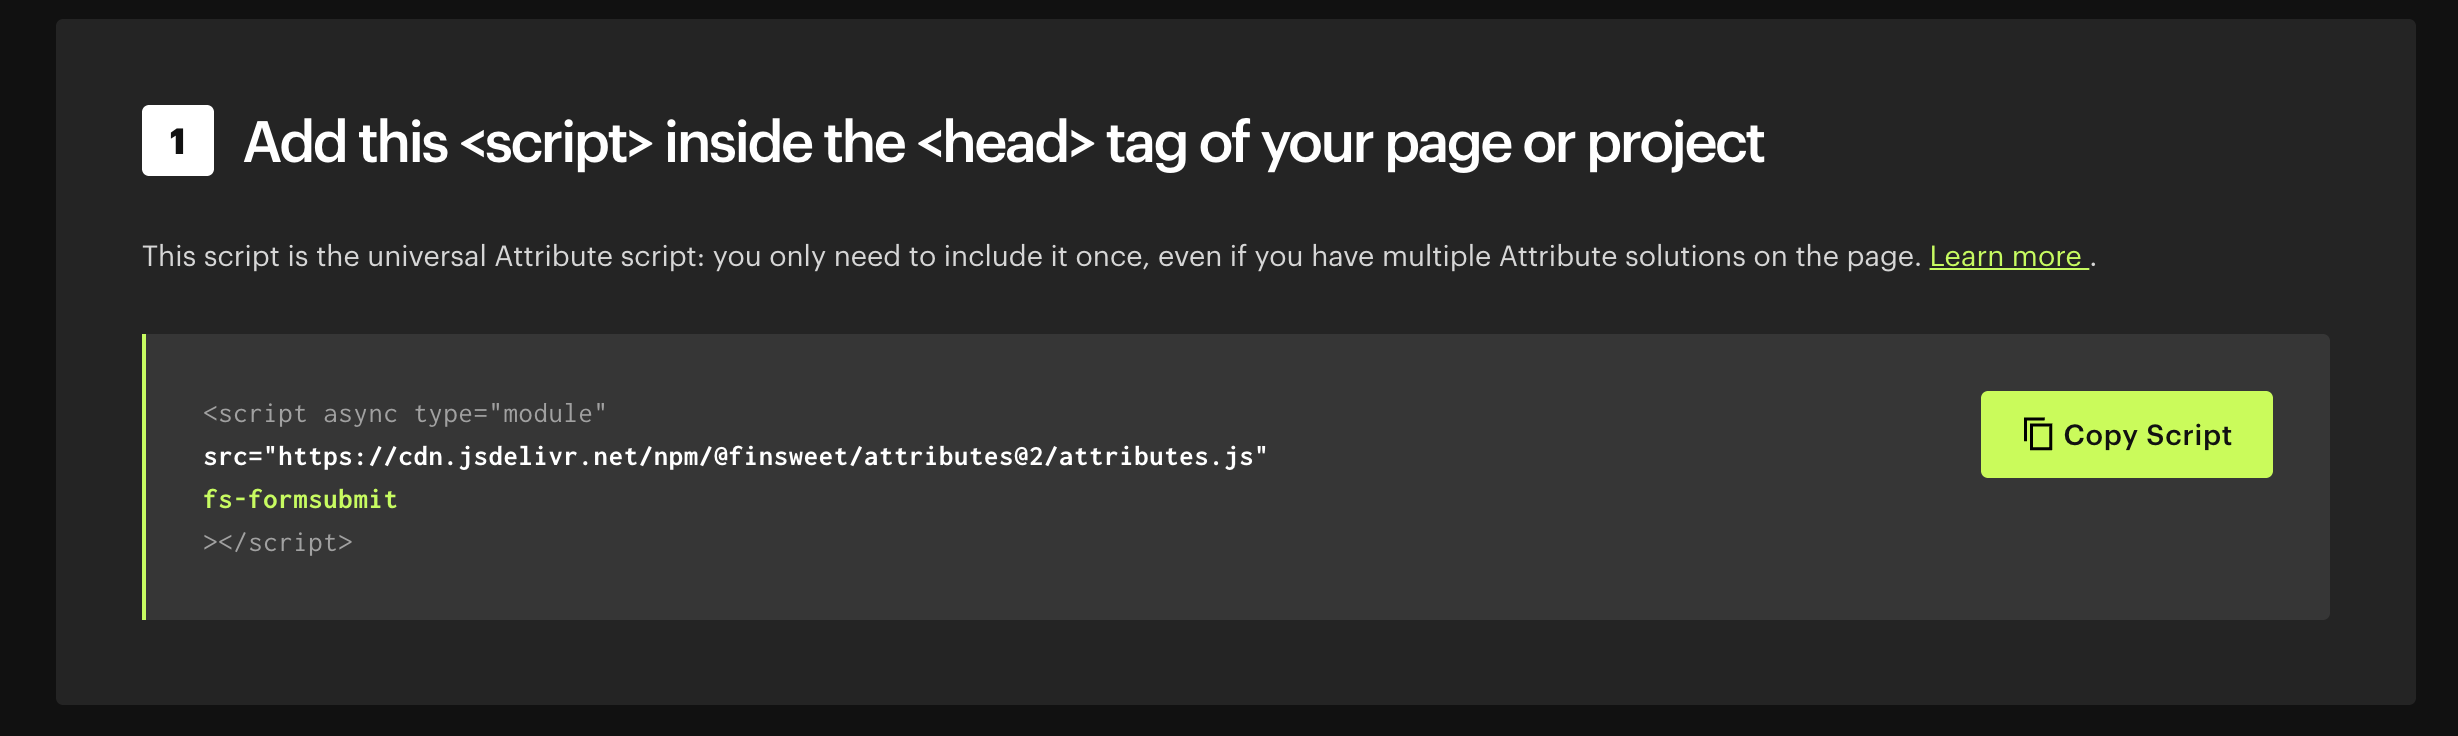
To set up finsweet is super easy as well, you want to go to: https://finsweet.com/attributes/form-submit
and grab the code that is in there:
<script async type="module"
src="https://cdn.jsdelivr.net/npm/
@finsweet/attributes@2/attributes.js"fs-formsubmit></script>
You want to add it to your page custom code at the bottom. Once that is done, you'll need to add a couple attributes so it doesn't jump you to a new page and so the submission stays there and same with the errors. this is what you'll want to add:
name: fs-formsubmit-element value: form
name: fs-formsubmit-enhance value: true
Make.com Set Up
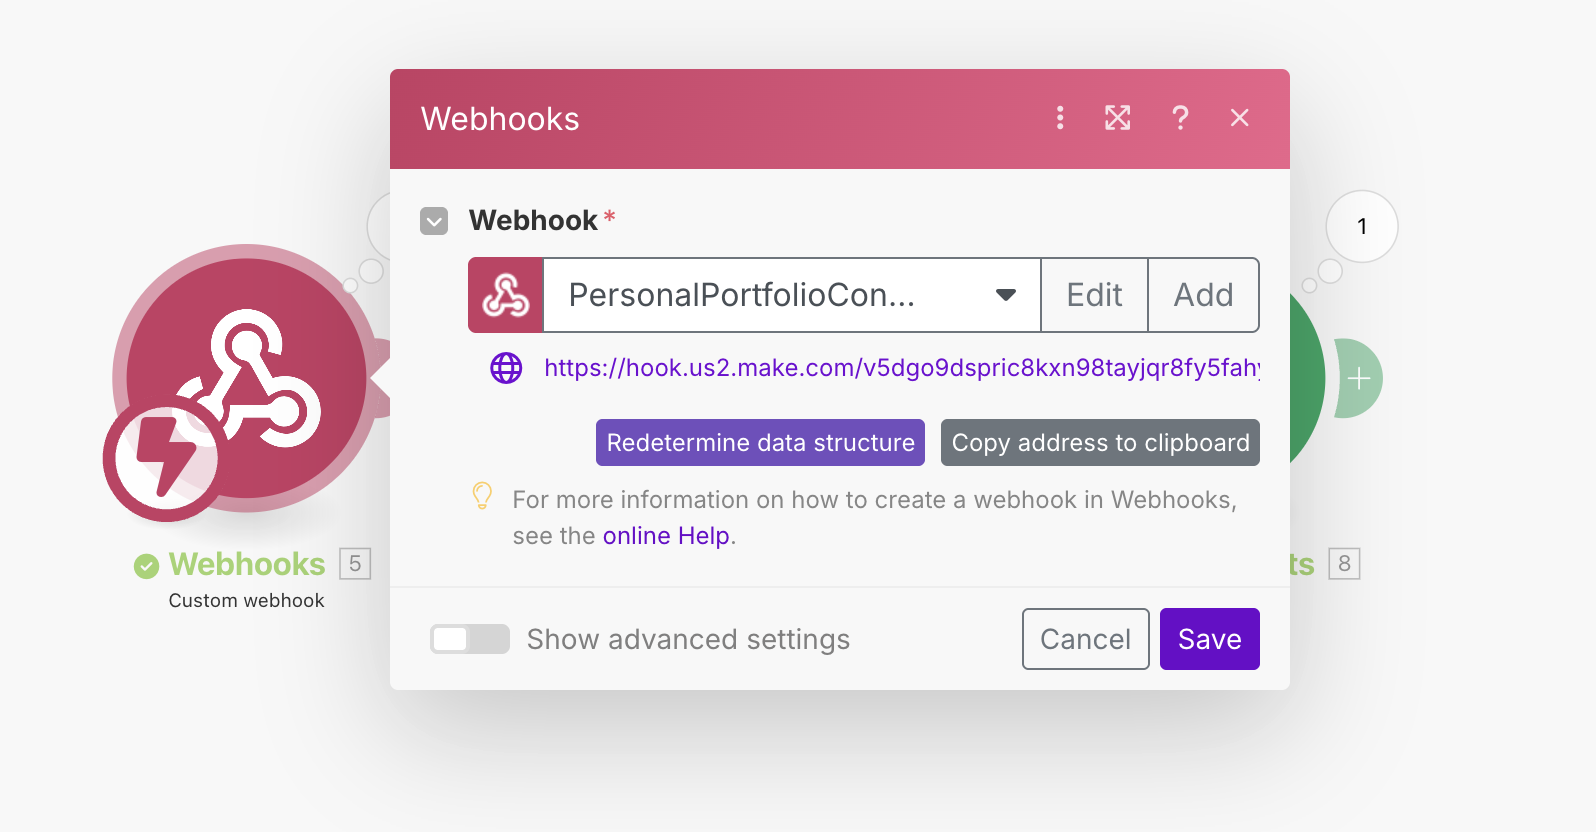
To set up a webhook using Make.com, you need to give Make.com access to your webflow site. From there you click the correct one, and then you click on determine data structure for it to be aware of how the data is coming in. So go back into forms page and fill it out and submit, your webhook should know what fields you have submitted now and what the data structre is. You will also need to add the hook url to your page. Inside the settings tab on the top right in webflow, add it to your actions and select POST. This should make it work.
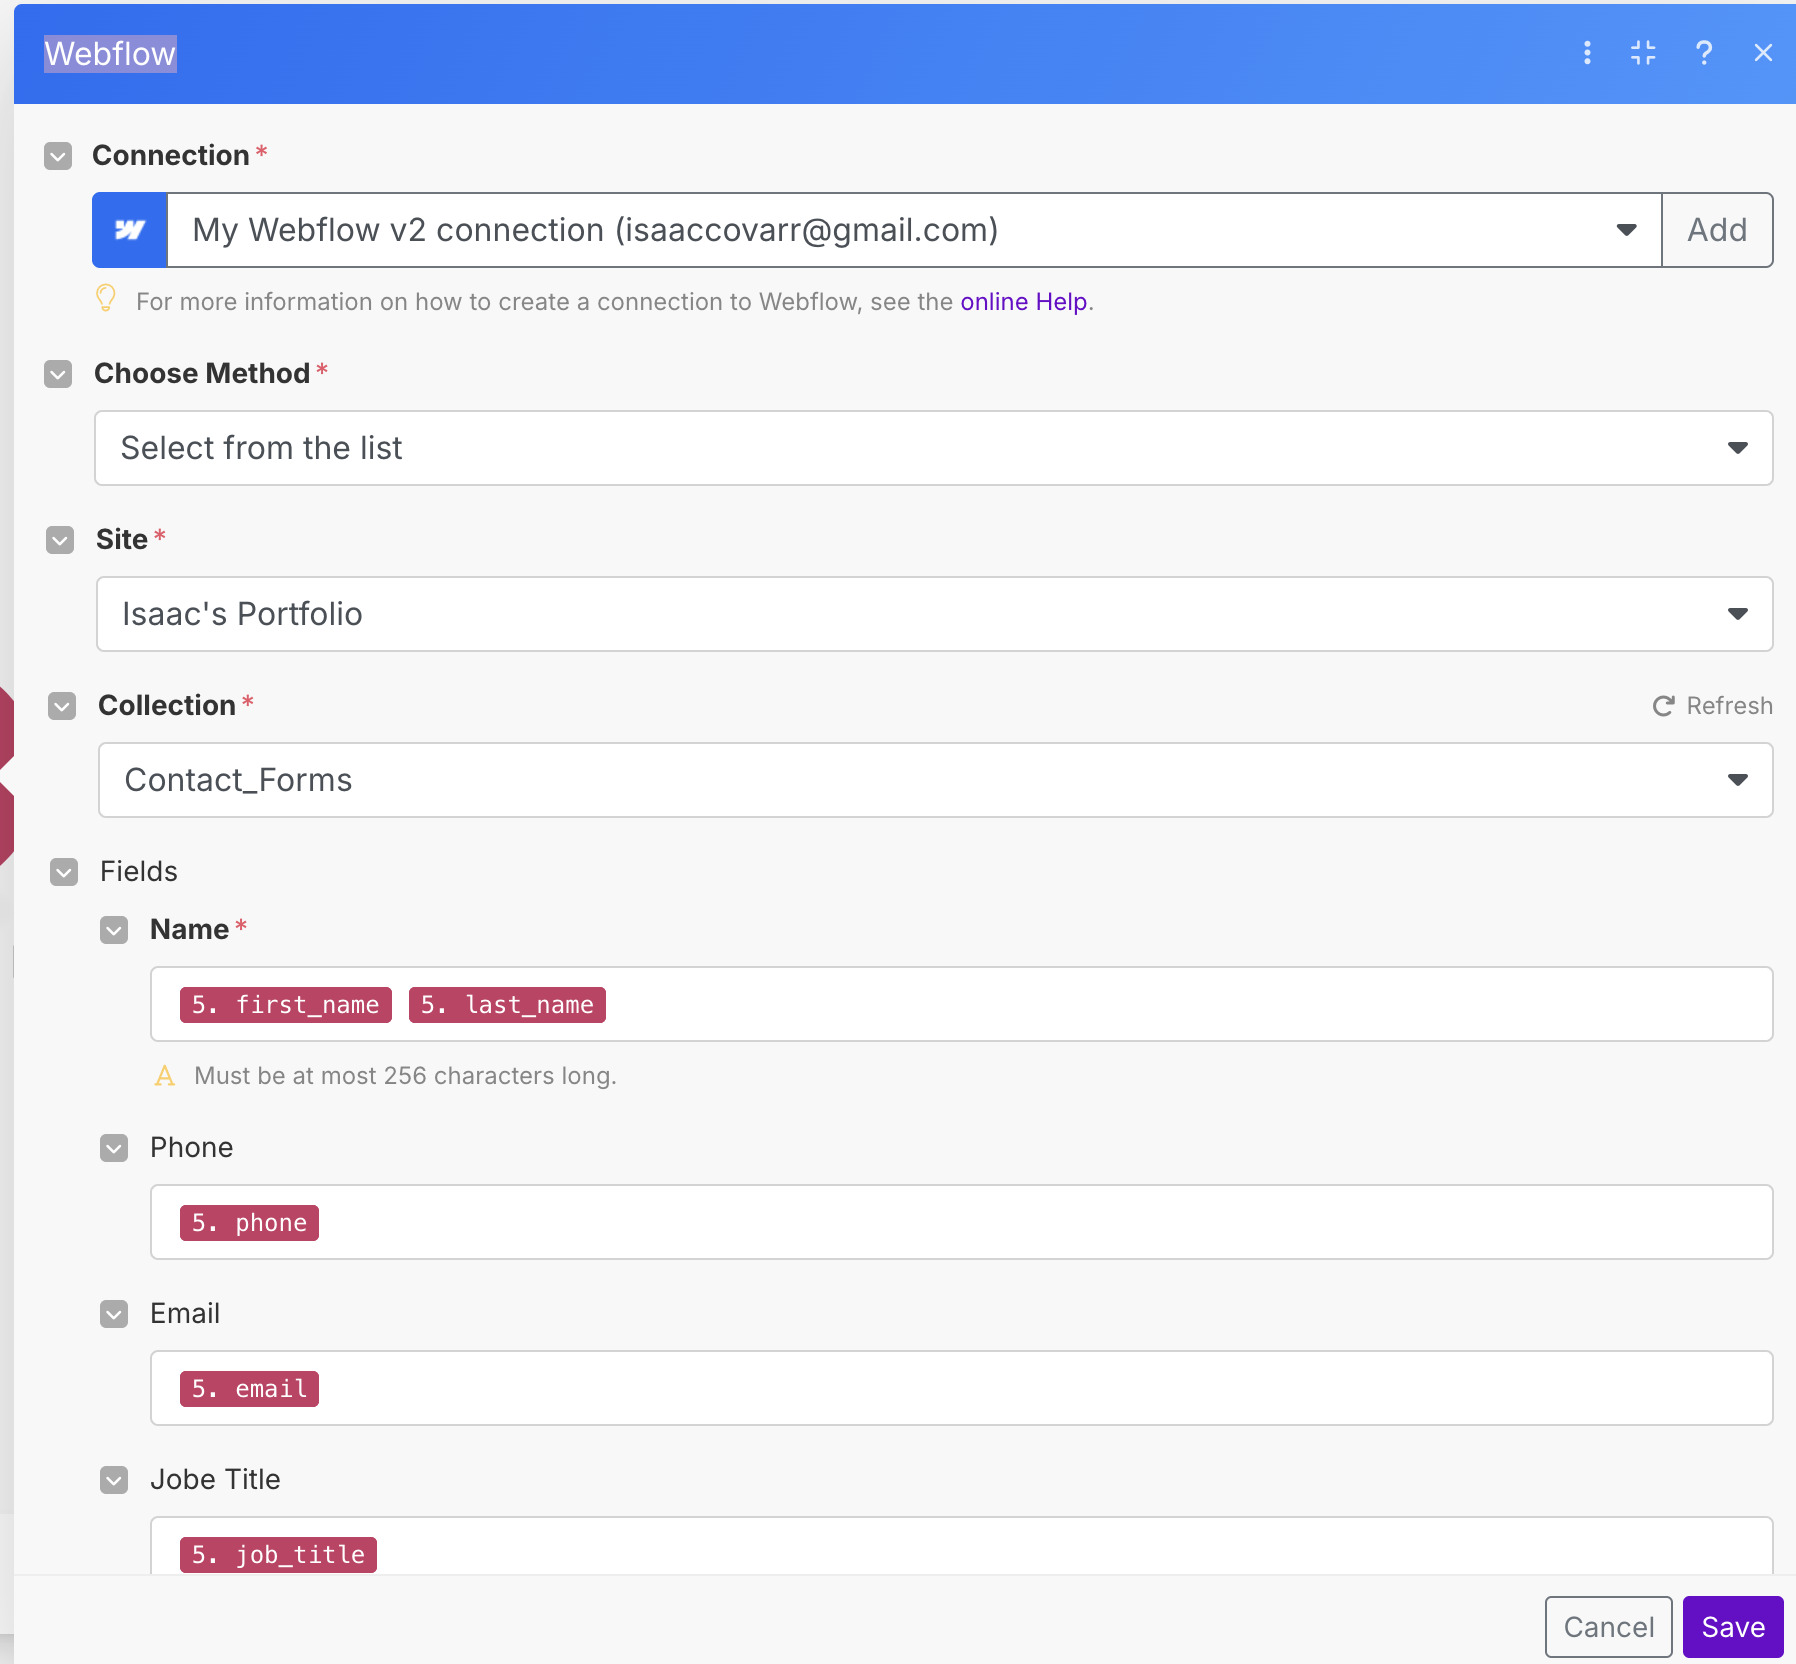
Here you will make a Webflow list item in the CMS. You will want to populate it from your webhook so find the form youre using and then it should give you the fields. From here you will find those names you made earlier and add them to the field as they populate. Once you do that, you can run the data and make sure its working, if its working you can see the data show inside your CMS (3 discs stacked). Make.com should also not give errors.
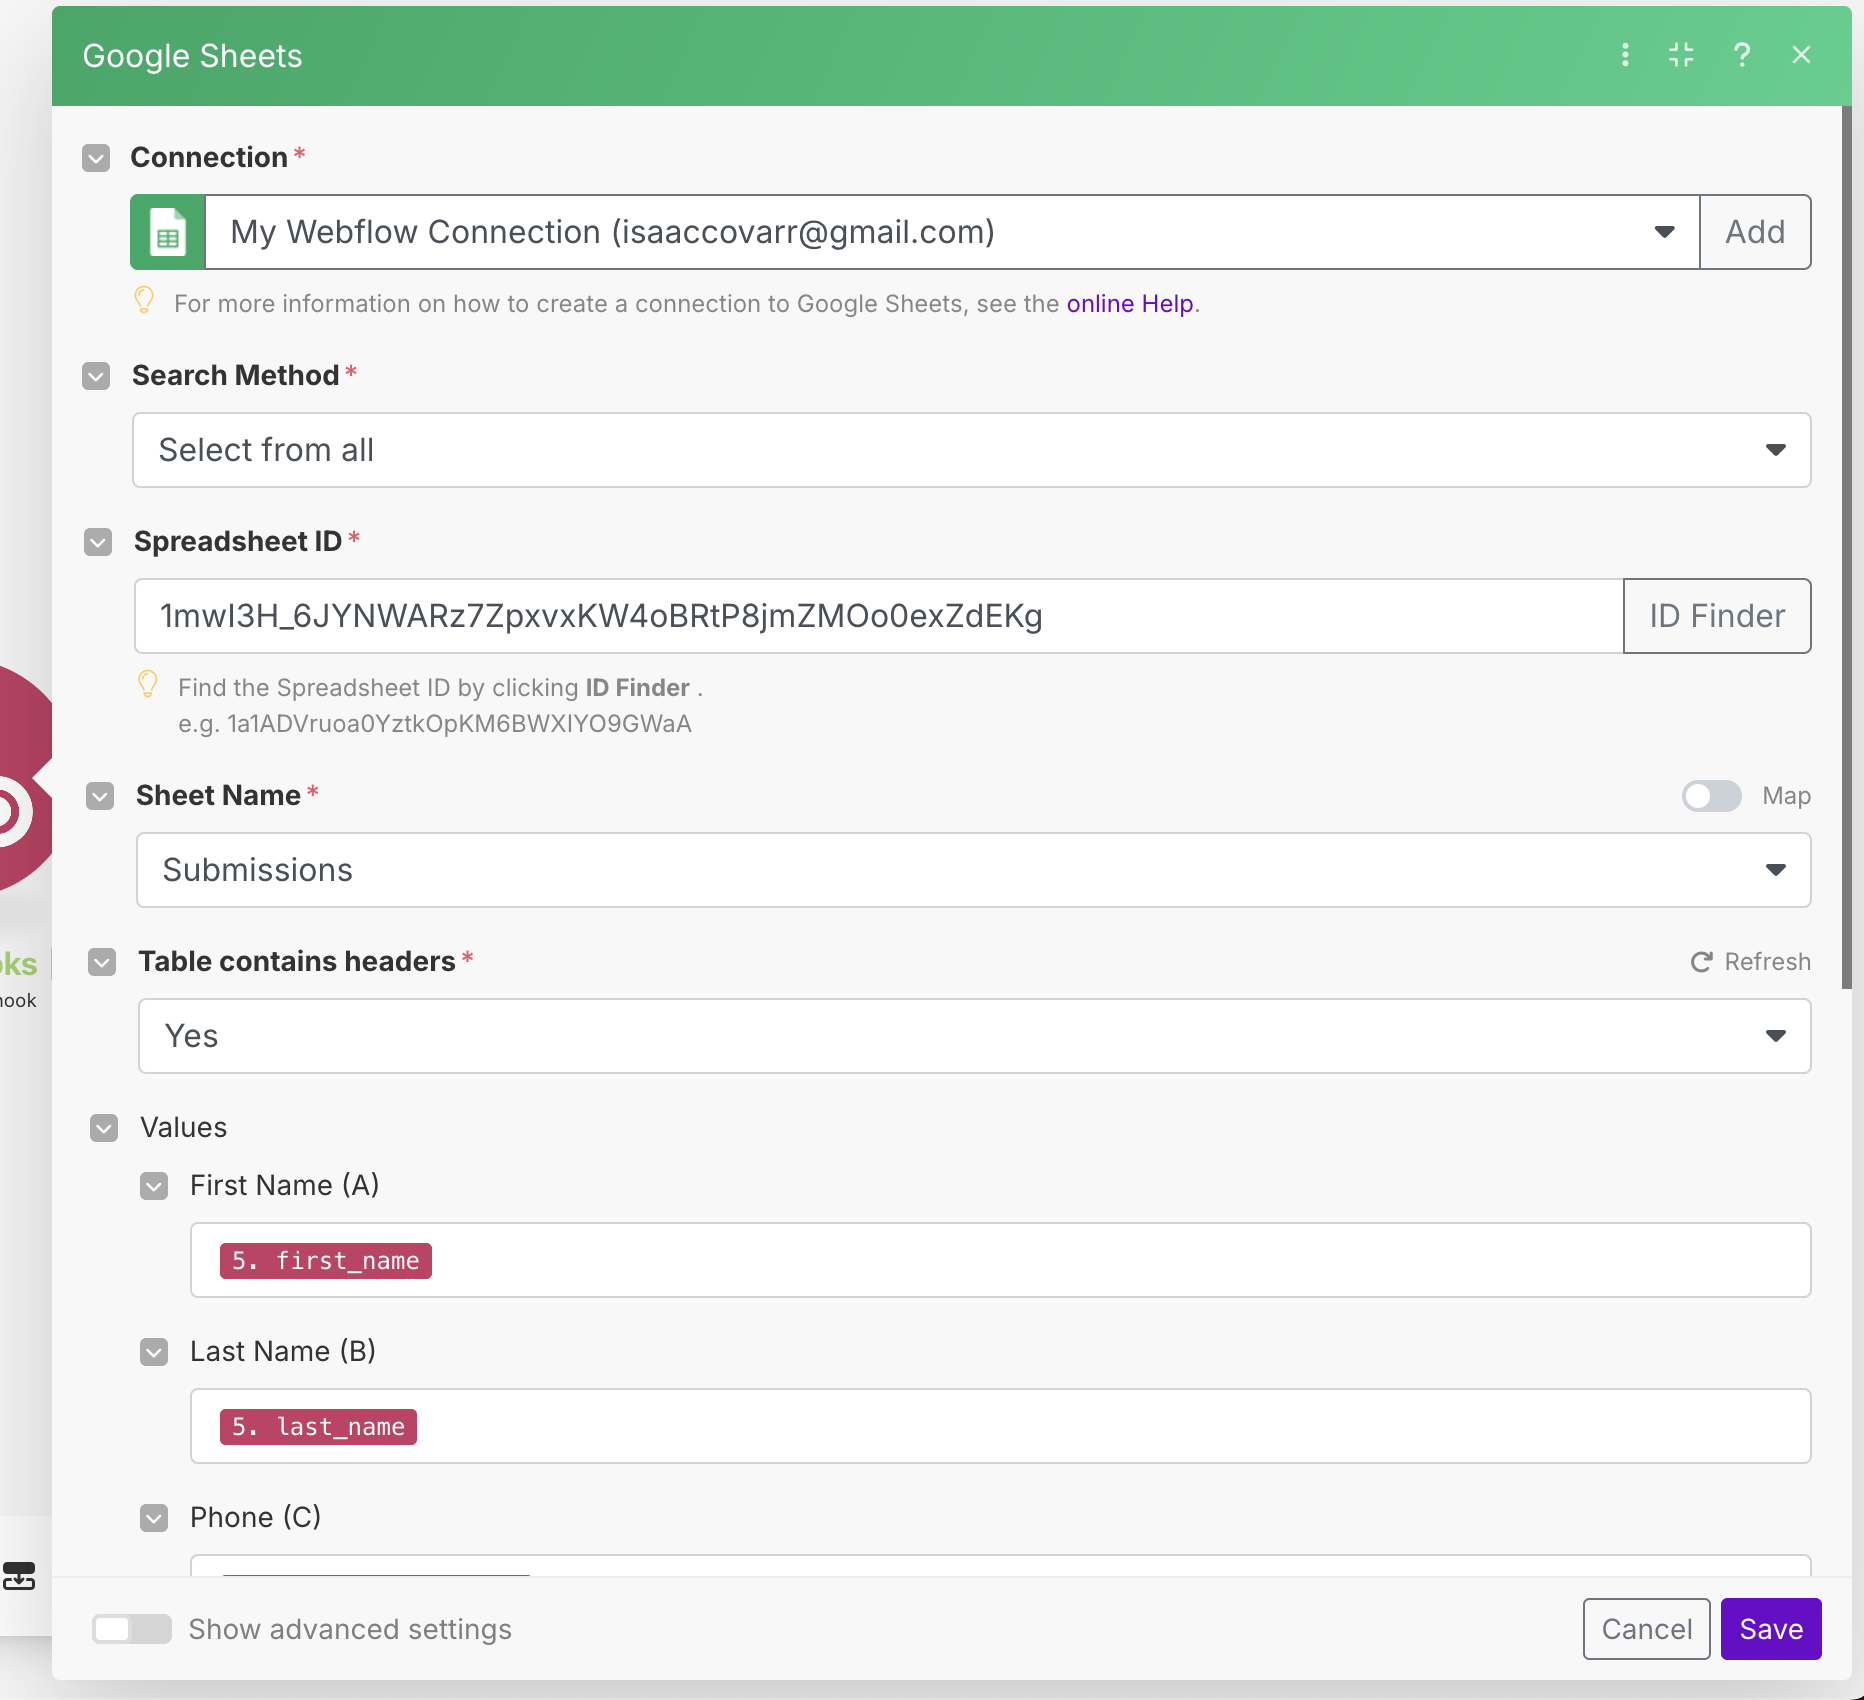
Once you have that done, go into google sheets, make a new sheet and populate it with the headings you want in each column. Then go to bake to Make.com and click the plus sign to the right of the Webflow module you just made and select google sheets. Sign in with your gmail account to give it access to sheets. From there you'll do the same you did in the previous steps, fill it out with the names and once you run it again, your google sheets will be filled out correctly with the data in the right spots.
Google Analytics & Tag Manager
This one took me a little longer because I usually work with Webflow that already has domain name and according to the documents, .webflow.io will not work with google tag manager so i needed to set up a custom domain to get it to work. Also there are a lot of extensions that could block tag manager from working (debug without these).

Inside google tag you will need to make 2 different tags, one is to make it work on all pages and the second one is to track the form submit. You will want to follow the prompts I have there, you will also need to link it to your google analytics account, so you'll want to start there first and set that up.
You will then need to make a custom trigger which will make it actually follow when the user clicks submit and trigger the event. Follow the prompts that are in this trigger as well to get the right trigger.
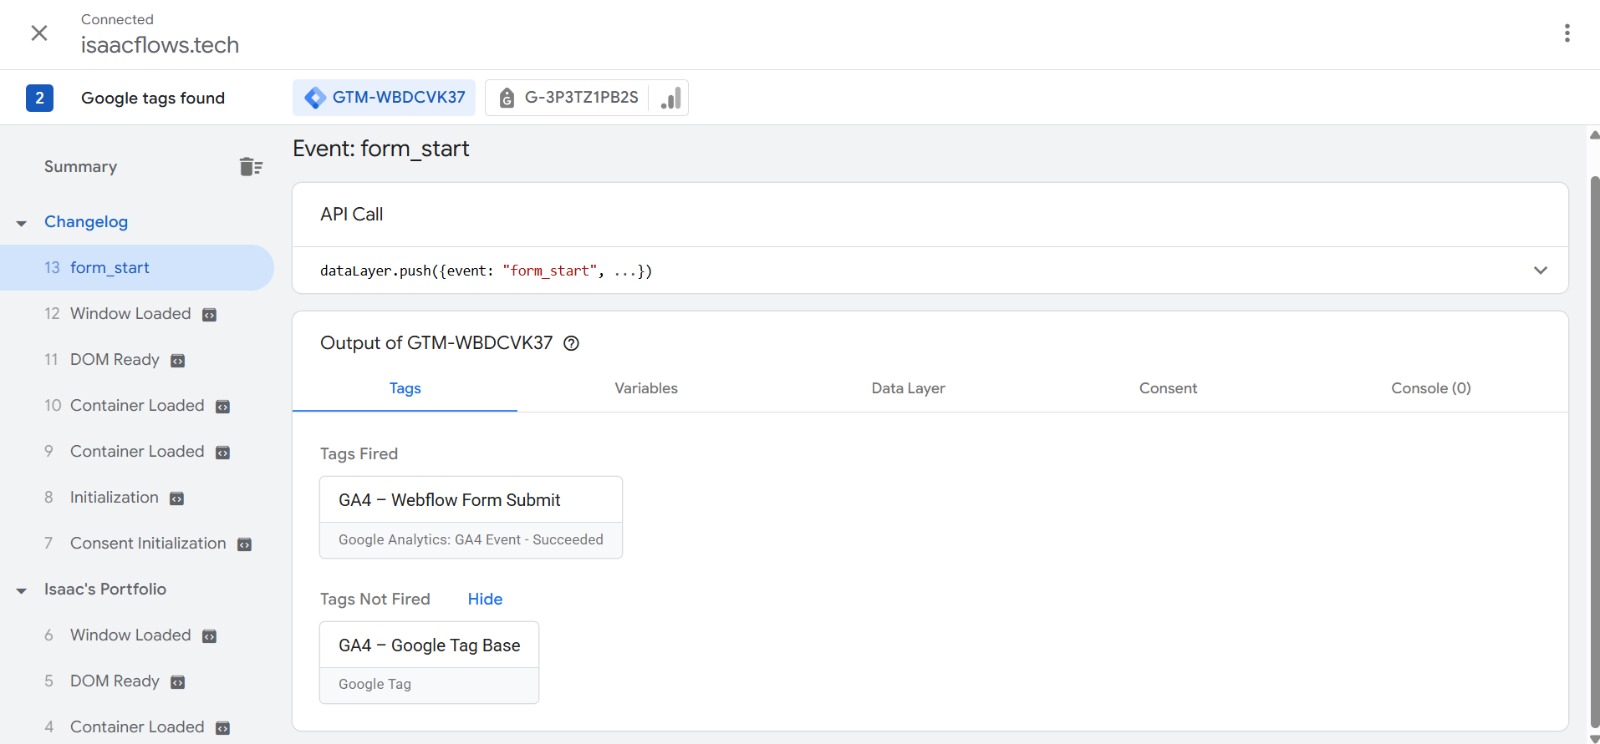
Here you can see that the tags are working, to get here you need to publish your new tags and then once you have done that, click preview and follow along with the steps Google will give you to test. If you connected things right you should see movement on the left panel. Here you can see that the form was fired once someone clicked submit.

Here you can view that all of them have hit where they need to and that the tags are working correctly as well. This is also just as important as making user the tag on the form is working.